Beginning Knitter Projects
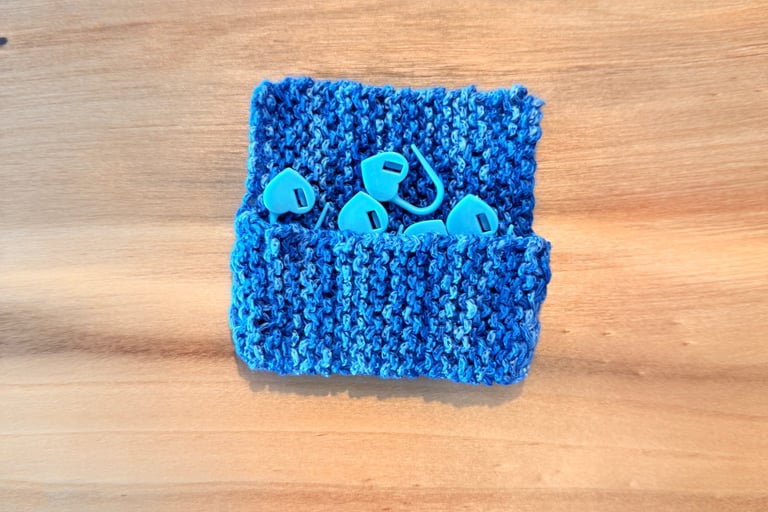
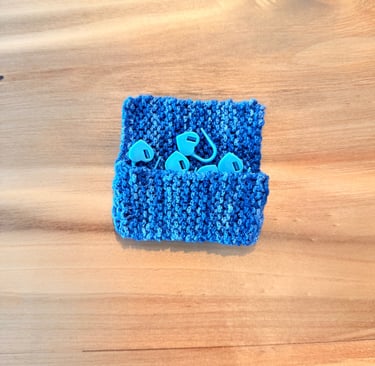
Project 1: Stitch Marker Saver
Skills: long-tail cast on, garter stitch, mattress stitch, bind off
Preferred yarn: Berroco Tillie or similar
Needles: Size US5, 6, or 7
For your first project, you’ll practice the knit stitch by making a panel about four inches long. Then, you’ll bind off and sew the sides to create a pouch for stitch markers. Be sure to bring it back to the shop and show it off! We’ll have a few stitch markers waiting for you.
Cast on 20 stitches using the backwards loop or long-tail cast-on method
Row 1: Knit every stitch
Repeat row 1 until piece measures approximately four inches.
Once the piece measures about four inches, bind off very loosely.
Fold the bottom third up to form an envelop. Sew up the sides of the envelope using mattress stitch and weave in ends.
Bring your stitch marker saver to the shop!
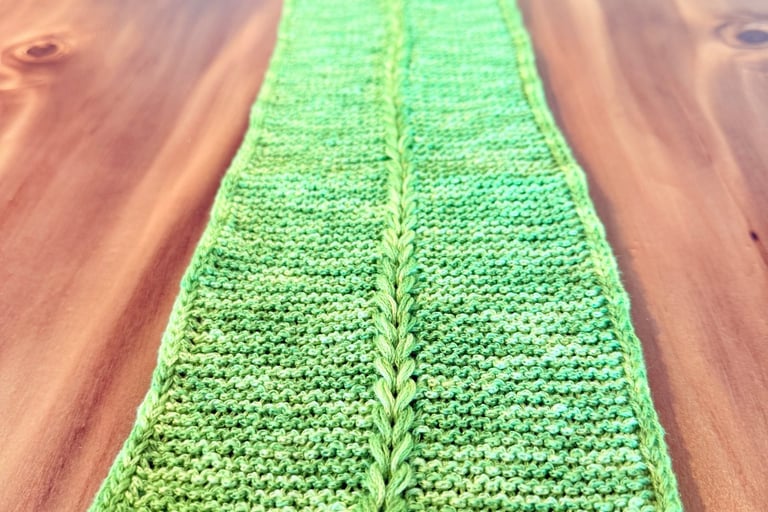
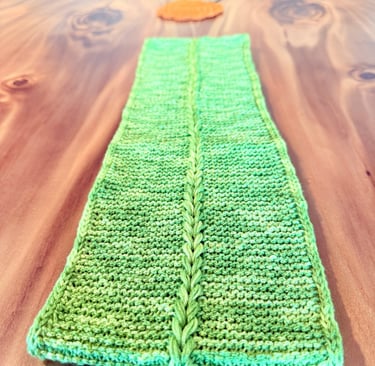
Project 2: Faux Cable Infinity Scarf
Skills: Long-tail cast on, knit stitch, slip stitch, i-cord edge, faux cables
Preferred yarn: Berroco Tillie or similar (use what's left of the yarn from your first project!)
Cast on 39 stitches using the long-tail cast-on method. This is essential--otherwise, your entire piece may unravel when you add in the faux cables later!
Row 1: Slip 3 (each purlwise) with yarn in front, knit to end of row.
Repeat until the piece is at least a yard long.
Slip 18 stitches to your right needle without knitting them.
Let the next three stitches fall off your needles. Replace the needles with stitch stoppers. Unravel this three stitches all the way down to the cast-on.
Grab the unraveled strands from three rows and chain up to create a faux cable.
Once you reach the top of your faux cable, return all your stitches to the right needle and bind off loosely.
Put a twist in the piece, like a mobius strip, and sew the bound-off edge to the cast-on edge. (The twist will help it lie flat. You could even put in two, if you plan to wear it looped around twice as a cowl.) Weave in ends and admire your work!
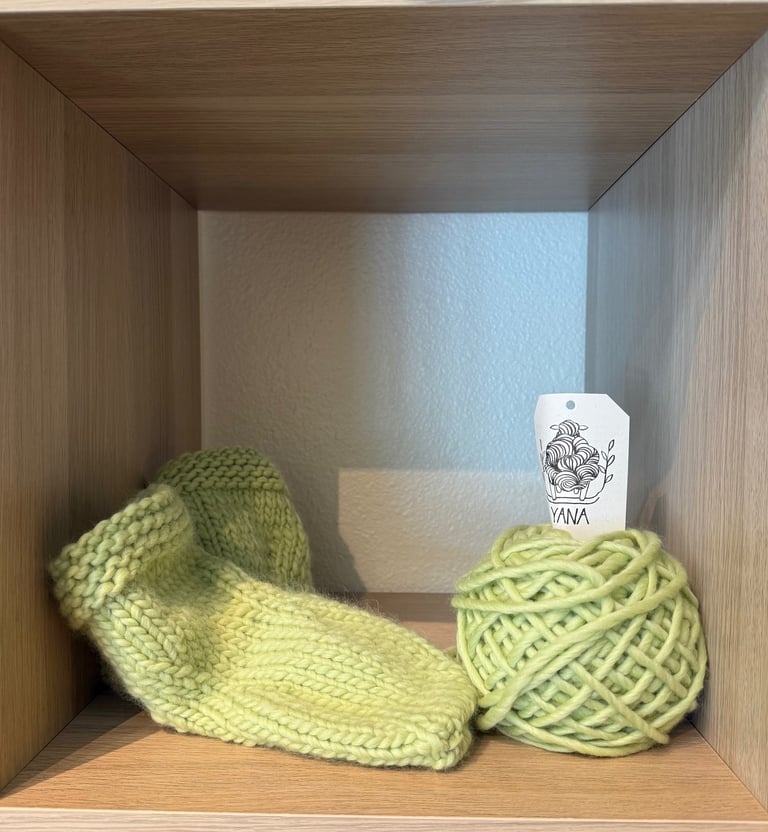
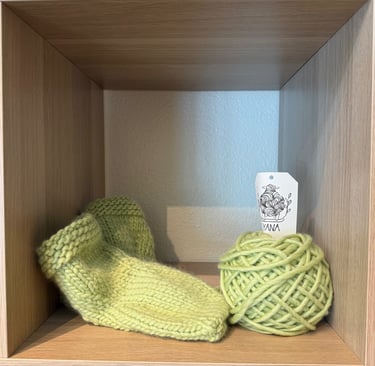
Project 3: These Booties Are Made for Lounging
Skills: Long-tail cast on, knit stitch, slip stitch, purl stitch, cable cast on, knit two together (k2tog), slip slip knit (ssk), knit front and back (kfb), bind off
Preferred yarn: Amano Yana (about 130 grams total) or similar chunky yarn
Optional: sew-on soles
These booties will fit women's size 5-10 shoe. To make them wider, add a stitch or two to the bolded number. To make them longer, add rows in multiples of two to the stockinette section (currently rows 29-38).
After projects 1 and 2, it's time to practice creating the classic: a stockinette panel. Stockinette uses knit stitches on the front/right side and purl stitches on the back/wrong side. You'll create two booties. Remember, though: these booties are made for lounging! If you'd like to walk around in them, sew on some soles to protect the yarn, or choose a synthetic chunky yarn.
Cast on 27 stitches
Rows 1-7: Slip the first stitch purlwise with yarn in front, knit the rest of the stitches
Row 8: Cable cast on seven stitches, then purl all 34 stitches
Row 9: Cable cast on seven stitches, then knit all 41 stitches
Row 10 and all remaining even (wrong side) rows: purl all stitches
Row 11: Knit
Row 13: Knit
Row 15: Knit 7, k2tog, knit 5, ssk, knit 9, k2tog, knit 5, ssk, knit 7
Row 17: Knit 6, k2tog, knit 5, ssk, knit 7, k2tog, knit 5, ssk, knit 6
Row 19: Knit 5, k2tog, knit 5, ssk, knit 5, k2tog, knit 5, ssk, knit 5
Row 21: Knit 4, k2tog, knit 17, ssk, knit 4
Row 23: Knit 3, k2tog, knit 5, kfb, knit 5, kfb, knit 5, ssk, knit 3
Row 25: Knit 2, k2tog, knit 6, kfb, knit 5, kfb, knit 6, ssk, knit 2
Row 27: Knit 1, k2tog, knit 7, kfb, knit 5, kfb, knit 7, ssk, knit 1
Work the resulting 27 stitches in stockinette for ten rows [or 12, 14, 16...for longer booties]:
Row 29: Knit Row 31: Knit Row 33: Knit Row 35: Knit Row 37: Knit
Row 39: Knit 3, ssk, knit 4, k2tog, knit 5, ssk, knit 4, k2tog, knit 3
Row 41: Knit 3, ssk, knit 2, k2tog, knit 5, ssk, knit 2, k2tog, knit 3
Row 43: Knit 3, ssk, k2tog, knit 5, ssk, k2tog, knit 3
After purling all stitches on row 44, bind off very loosely. Seam the toe together and then use mattress stitch to seam the bottom. Seam the back of the heel and cuff like seamed stocking, letting the cast-on and slipped stitches show as a lovely braid.
Repeat all steps to create the second bootie.
Sew on soles if you want to walk around in your booties. Otherwise, kick your feet up, throw on your booties, and enjoy stitching while keeping your little piggies nice and warm.
Congratulations! You now know the basis of almost all knitting: stockinette stitch!
© 2025. All rights reserved.
1900 E Howard Ln Suite A7 | Pflugerville, Texas 78660 | rachel@yarningfiberarts.com | (512) 766-9298
Warning: Rachel is terrible about answering calls and listening to voicemails.
Hours
Closed Mondays & Tuesdays
Wednesdays & Thursdays 3 - 7
Fridays noon - 7
Saturdays 10 - 6
Sundays noon - 5